So you took that perfect picture with your phone and you what to have it on your computer, share it with your friends and show the whole world. Or you have that favorite photo of your family or car that you would like to send to your phone and set as a wallpaper. But how do you get it up there? The question is “How do I transfer my phone pictures to my PC and vice versa?
Not to worry. We will go over the five easy ways to send your picture from your phone to your computer in no time. Also, keep in mind that the following principals and instructions (methods 2 to 5) apply to sending your pictures to your cell phone. The only difference is that when you link the two together, you will move the content to the opposite direction. The important issue here is establishing the link between the two devices to be able to transfer data, which in this case is images. Also, please keep in mind that there are a lot of different computers, phones and operating systems out there and some steps might slightly vary, but we are sure that with a little guidance from us you will be an expert in no time.
So without further due let’s dig into the important question: “How do I transfer my phone pictures to my computer?” or “How to send pictures to my phone?”
My phone pictures: Method 1
Sending you pictures to you computer via MMS (multimedia messaging service).
This method allows you to send you pictures from your cell phone directly to your e-mail. From there, you can use the photos any way you want, exactly as if you received them via e-mail from your friend. This is the easiest method to download your pictures, but it also may cost some money. The charges depend on your carrier and the cell phone plan you have. Some plans offer unlimited MMS messaging and/or data and may not cost you anything extra to send an image to your PC. Please follow the steps below:
- Take a picture with your phone or select one from the image gallery.
- Click on the “Send picture/image” button.
- Instead of the recipient’s phone number, enter your e-mail address.
- Press Send.
- Go to your e-mail account and download the picture to your computer. Do it the same way as you would do with any e-mail attachment.
My phone pictures: Method 2
Download pictures to your computer via USB cable.
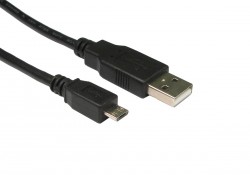
Most phone come with the included USB cable. If you can not find it, you can always grab one from Amazon.com or any retailer near you. They are not expensive either, you can get a generic brand USB cable for a few dollars, just make sure they fit your phone, as different cell phone manufacturers and models may have a different ports. Be sure to check the USB cable from the old phones you or your family members own or owned, many times you will get lucky and will not need to buy one. One you have it, follow the following instructions:
- Connect your phone to the computer with an USB cable. Make sure your phone is ON.
- If you have iPhoto, open the program and click on the drop arrow next to your phone on the left-hand sidebar. Then double click on the photos you want to transfer and drag them onto your desktop or folder.
- If you don’t use iTunes, then go to “My Computer” on your PC, select the drive (your cell phone in this case), find the pictures folder and copy or cut and paste your images as you would do with the ordinary flash drive.
Please keep in mid that some computers will automatically offer to open the phone folder once you connect the phone to your PC (just like with Flash Drives). Also, some PCs will automatically recognize the new device (your cell phone) and some will install the drivers automatically. Older computers may ask to install a driver to connect your phone. They can be found online (phone manufacturers website) or on CD that came with the handset.
My phone pictures: Method 3
Syncing your phone with your computer. This method is also very easy as the sync program will do everything for you. To transfer pictures to your PC you will need to install the program the first time you connect your phone to you computer. They are available free of charge on handset manufacturers’ websites or you can also get a generic program on sites such as download.com. If you choose to download the syncing program from a third party website, make sure you use a reputable one to avoid malware and viruses.
Once you have a syncing program installed, just follow the steps on the screen and you will quickly be able to sync your phone’s content with your PC. Another advantage of syncing your phone with your computer is that you can also back up and sync your calendar, SMS messages and phonebook, which can be very useful in case you lose your phone.
My phone pictures: Method 4
Transfer your pictures from the memory card to your computer. Most new phones have a slot for a memory card. A lot of them use a micro memory card. They are very similar to the regular cards, except that they are much smaller to fit into your phone. Before you use this method to transfer your pictures, make sure they are stored on your card. To do that, you will need to specify a directory/place where your photos are stored on your phone when you take pictures. Just go to the camera settings and change where your images are saved. If you have already saved your images in your cell phone memory, then you can easily move or copy them to your card. So, to transfer images to your computer follow these steps:
- Take out the memory card from your phone.
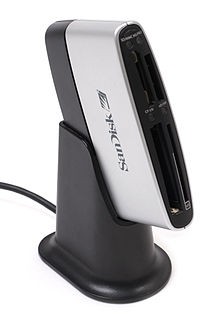
- Insert it to your card reader. Many computer have built in readers and if yours doesn’t, you can get one for a few dollars on amazon.com
- Find the pictures you want to download to you computer on the memory card.
- Copy/cut them and paste onto your desktop or selected folder. The process in exactly the same as using the Flash Drive.
My phone pictures: Method 5
You can also transfer your pictures and sync your phone’s content with your computer wirelessly via Bluetooth. This method is convenient, because you don’t need any cables, but you will need to have a Bluetooth on your PC or Laptop. Alternatively, you can also purchase a Bluetooth Adapter and connect it to you computer. In order to begin transferring your phone’s content you will need to pair both devices. We will discuss this in more detail in the near future.


